Showing posts with label First Impressions Molds. Show all posts

Monday, 29 October 2018

Jack and Lilian

My uncle and aunt in the mid-1920's


For this layout I used some paper from the Remnants collection by Blue Fern Studios.


Blue Fern Studios
Remnants - Devonshire
Blue Fern Studios
Remnants - Highgate
Blue Fern Studios
Remnants - Vignette


I trimmed the Devonshire paper down slightly, ripped off two of the corners, then distressed and inked the edges.  I layered this over the  Highgate paper, tucking in some corrugated paper under the torn edges.  I also put a piece below the photo.  The raised ridges of the corrugated paper were brushed with white paint.


On the background I did some stencilling with modelling paste (Faber-Castell whipped spackle) and added some green watercolour.  I also used a pencil crayon to add a little more pink to the paper along the shaded areas of the flowers.


Memory Box
Texture Splatter


These are the dies I used:

Tattered Lace
Velvet Lace Mini Ruffle Rectangles
Tattered Lace
Sparkle Border


I cut the edges off the Sparkle Border and glued them along the edges of the layout.


This is the chipboard set I used:

Blue Fern Studios
Mesh Bits

I painted the chipboard brown and then applied Ranger Texture Paste Opaque Crackle.  When that was dry I randomly dabbed it with Scattered Straw Distress Ink.


The toadstools and a few of the flower centers were made with molds and Sculpey Ultralight clay and then painted.

First Impressions Molds
Assorted Flower Centers

Pointed Toadstools by JEM


I tucked some natural-coloured reindeer moss into the flower clusters and wound some wired thread with raffia bows by May Arts through them as well.  The leaves and seed stems are by 49 and Market.


Thank you so much for taking a look!

Friday, 18 August 2017

Going for a Walk

My great-aunt Ada


For this layout I used a piece of Blue Fern Studios paper as the background.


Blue Fern Studios
Wanderlust - Road Trip


This is the chipboard I used:


Wycinanka
Blueberry Swirls - big frame


I embossed the frame with Stampendous Aged Aqua Embossing Enamel.


This is the die set I used:

Tattered Lace
Ornate Leaves


The centers for most of the flowers were made with a mold and Sculpey Ultra Light.  I painted them yellow, applied a brown glaze, wiped off the excess glaze and then dry-brushed white paint overtop. A few of the smallest flowers were made with a mold as well.  I inked the edges of the petals with Ice Blue Colorbox Chalk Ink.


These are the molds I used:

First Impressions Molds
Assorted Centers
First Impressions Molds
Daisy Set


Here are some more close-ups:


Thank you so much for taking a look!


Tuesday, 11 July 2017

Running on the Beach

My son Colin in July 2008


For this layout I used a piece of 49 and Market paper.

49 and Market
Sand and Sea - In the Bluff


I ripped along the top edge of the paper after a failed attempt at punching.  My punch had trouble with the thick paper and mangled it.

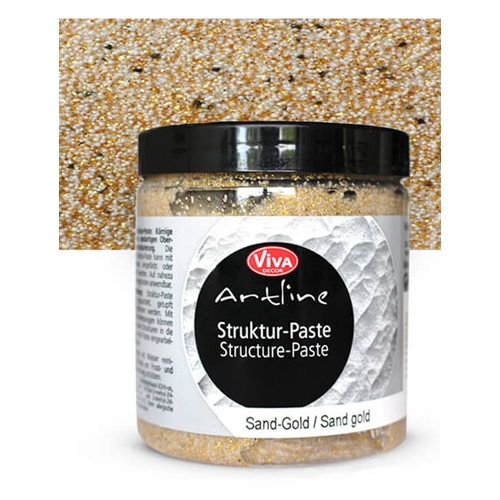
I stencilled on the background with Sand-Gold Viva Decor Structure Paste.


Prima stencil
Poppies


These are the dies I used:


Prima
Parisian Lace
Spellbinders
Fleur de Lis Squares


The shells were made with molds and Sculpey Ultra Light, then painted.  I also brushed some of the Sand-Gold Viva Decor Structure Paste on them.


First Impressions Molds
Mini Seashell Set
First Impressions Molds
Shell Set 9


The small flowers with the blue centers are by Petaloo.  The ecru and small white flowers are by 49 and Market.


Thank you so much for taking a look!

Sunday, 2 July 2017

Backyard Swing

Me when I was two in 1970


For this layout I used a couple of pieces of Blue Fern Studios paper.


Blue Fern Studios
Serendipity - Merriment
Blue Fern Studios
Sanctuary - Garden Plaza


I did some stencilling with molding paste on the background using a doily stencil after coating the paper with matte medium first.  I then did a wash overtop with watercolour.  I didn't like the way it looked so I wet it and tried to lift some of the colour off with tissues but most of it was covered by the photo and embellishments anyway.


These are the dies I used:


Spellbinders
Labels Forty Seven Decorative Elements
Cheery Lynn Designs
Ambergris Tiny Doily
Cheery Lynn Designs
Horizon Circle Boutique Stacker
Cheery Lynn Designs
Flourish #13


The chipboard flourish above the photo is an old one from my stash by Riff Raff Designs which is no longer in business.

I did a white crackle finish on the chipboard flourish and then rubbed brown and red inks overtop, wiping off the excess with a damp cloth.  I also traced around the edges with a brown marker to accentuate the edges more against the pink background.


Some of the flowers and the decorative plate were made with Sculpey Ultra Light and molds then painted.


First Impressions Molds
Small Flower Set 4
First Impressions Molds
Daisy Set

Prima - Iron Orchid Designs
Royale


I painted the clay flowers red and green and then dry-brushed white paint overtop to bring out the details.


For the decorative plate under the photo, I brushed on a glaze made from gel medium and a bit of brown paint and then wiped off the excess with a damp paper towel.  After that was dry, I rubbed pink and white paint overtop with my fingertip to highlight the raised areas.


The pink and red paper flowers are by 49 and Market.  The little white ones are by Wild Orchid Crafts.


Thank you so much for taking a look!