Wednesday 23 September 2015

Audrey May

My husband's grandmother


For this layout of my husband's grandmother I used a piece of paper from Prima's Timeless Memories collection.


Timeless Memories - Forever


I did some stencilling with molding paste mixed with a bit of cream coloured paint on the background, then did a wash of diluted brown ink over the stencilled areas.

Prima 6"x6" stencil - Poppies


I also did some random stamping with brown ink.

Kaisercraft texture stamp - Script

Kaisercraft texture stamp - Grid


The burlap mat was glued onto a piece of plain chipboard so it would stay flat overlapping the wood-cut doilies and foam tape was used underneath to level it.  I also put a piece of plain chipboard under the photo before gluing it to the burlap mat to add more dimension and so it would stay smooth over the rough texture.

I tucked little pieces of natural-coloured reindeer moss under some of the other embellishments.


The scrolls around the photo are Wycinanka chipboard.

ROMANCE - ornamenty, wzór 1
ROMANCE - ornamenty, wzór 2
ROMANCE - ornamenty, wzór 6


Thanks for looking!


Monday 21 September 2015

The Funk Five

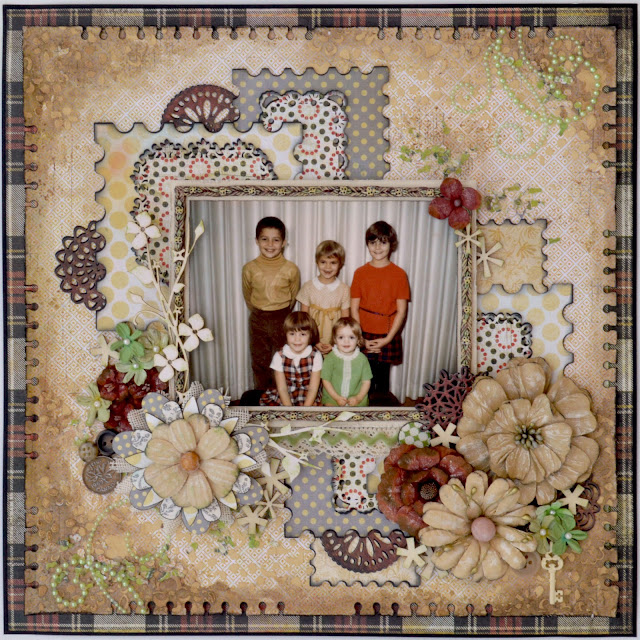
Me (in green) and my siblings in 1969

This was the second in my half a dozen layouts that didn't want to get finished and it was a real struggle.  No matter how many details I tried to add, it continued to be boring to me.  But it's finally done so I can tuck it away and not have to look at it anymore, lol.

I used Basic Grey papers from their Jovial, Serenade and Picadilly collections.

I stencilled with molding paste tinted with a bit of paint in the corners, then shaded around the edges with brown watercolour paint.


  I used the little bits of "confetti" left over from the punched edges and sprinkled them in several patches around the layout, then lightly brushed over them with diluted matte medium to glue them down.  The backside of the main background paper was green so I thought these confetti pieces would help tie the green of my dress into the colour scheme.


I made the frame around the photo with a mold and  Premo Sculpey clay.  Normally I like to use Sculpey Ultralight because of its light weight and because it is so easily conditioned or softened by hand instead of needing a pasta machine but it doesn't work well with thin, delilcate pieces.  It stretches very easily when unmolding and putting the mold in the freezer for a bit just tends to make the delicate pieces crack more easily when unmolding them so I prefer to use Premo Sculpey for these pieces.  I tried Original Sculpey once but the pieces break easily after they are baked.

Best Flexible Molds -
Tassels, Beads and Borders


The border mold I used is rather short so each side of the frame had to be pieced together, the corners mitered and then glued with Sculpey Bake & Bond before baking.  I then painted it black and brushed red, green and golden yellow paint lightly over the top to highlight the details.


As usual, I layered all the die-cuts over a dark copy to accent the edges.

These are the dies and punch I used:

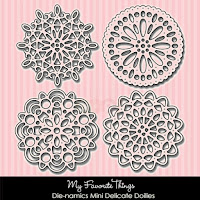
My Favorite Things - Mini Delicate Doilies
Ek Success - Round Binding Edge
Spellbinders - Floral Assortment

Spellbinders - Postage Stamps
Spellbinders - A2 Floral Ribbon Threader


Since the Canadian penny is no longer being made and is being phased out I decided to include a penny that I had from 1969 (the year the photo was taken) in the layout.


Thanks for taking a look!


Saturday 19 September 2015

Wind Tunnel

Colin on Sept.28, 2007


The past couple of months I've been in a creative funk and hated every page I've started.  I kept putting layout after layout aside and starting another hoping for something to click but instead ended up with six unfinished layouts.  It's been difficult getting myself motivated but I finally decided to just get them over with so I can move on.  This is the first one I managed to finish.

I used an old piece of Prima paper from their Fairy Flora collection for the background.  A lot of the flowers I used were also from that collection.  I inked around all the flowers and leaves with black to make them stand out more and shaded around the edges of the background paper with green watercolour paint.

Fairy Flora - Pixie Garden
(I used the backside of this for the background)
Fairy Flora - Summer Storm
(I used the backside of this for some of the diecuts)


These are the dies and punch I used:
Tim Holtz die - Autumn Gatherings
Martha Stewart punch - Flourish Lace

Memory Box die - La Rue Flourish
Spellbinders die - Pearl Effects
Cheery Lynn die -
Rum Punch Doily
Cheery Lynn die
Tiny Rum Punch Doily


Some of the flower centers were made with a mold and Sculpey UltraLight clay, then painted.
First Impressions Molds - Assorted Centers


The centers on the La Rue Flourish diecuts were spiral flowers cut using the Cricut Flower Shoppe Cartridge.  I glued some microbeads into the center of the largest one.


A couple of the other flower centers were made using a set of cutting dies (the same one I used for flowers in my Tammy and Monsie layouts).  I glued microbeads in the center of these as well.

Cheery Lynn Designs -
Build a Flower #1


On the background I did some stencilling with Artichoked Shimmerz Texturez paste.

Prima - 6"x6" stencil - Fluttering Flowers


These are some of the chipboard pieces I used:
Wycinanka chipboard -  Pelnia lata 2
Blue Fern Studios - Layering Stems


I also painted some metal pieces using Vintaj Patina paints.


Thanks so much for looking!