Friday 26 June 2015

Isabella

My Great-Great-Grandmother, Isabella

You may have figured out from all the heritage layouts I do, that I love old photographs. I found this photo of my great-great-grandmother on Ancestry.com about 5 years ago.  Recently I started scanning and uploading old family photos (at a high resolution) to Pinterest so relatives can view them for free and print them up if they want.  I'm hoping someone eventually reciprocates, so I can get some more heritage photos to scrap, lol.


I didn't do any complicated multi-media techniques on this layout, just inking around edges and a tiny touch of subtle watercolour here and there.


The papers are from Bo Bunny's Weekend Market and Time Piece collections from a few years ago.

Weekend Market - Tapestry
Weekend Market - Postage
Weekend Market - Around the World
Timepiece - Moments
Timepiece - Unlock


These are the dies and punch I used:

Spellbinders - Oval Majesty
Spellbinders - Marvelous Squares

Martha Stewart punch set - Eyelet Lace


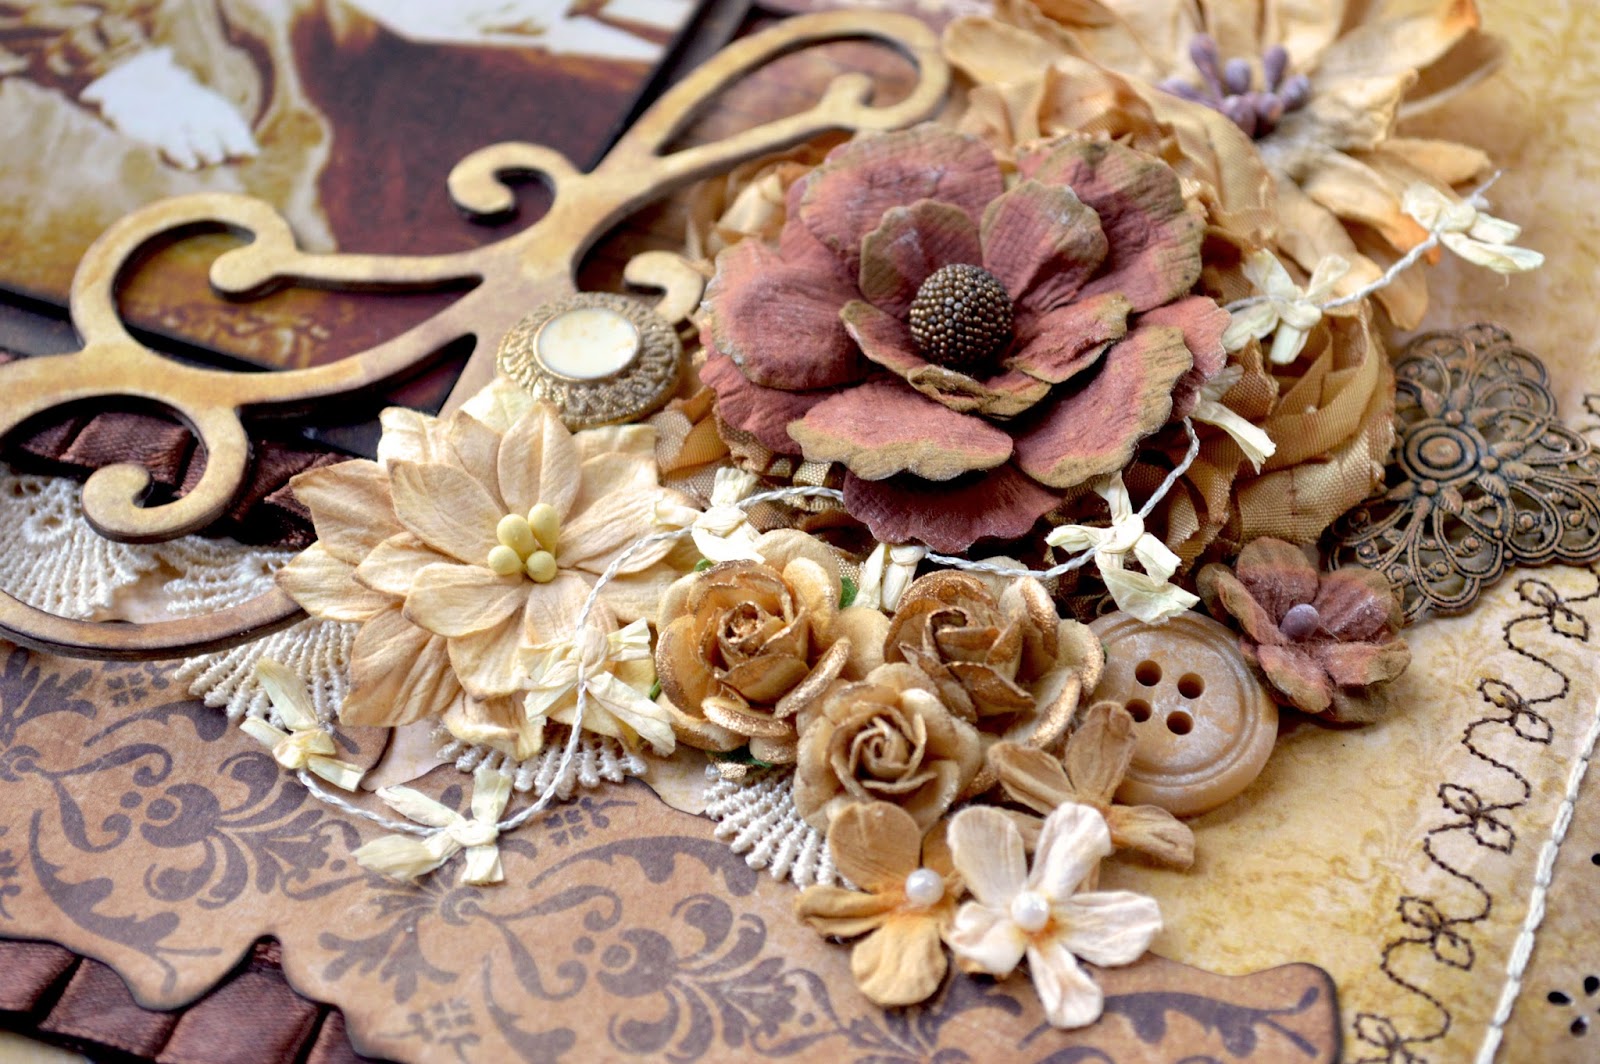
As usual, I layered the die cuts on a darker version and offset them slightly to accentuate the edges.


Around the edges I did some hand-stitching with a cream-coloured embroidery floss and machine-stitching with brown thread.


The metal of the pendant didn't quite fit with the colour scheme so I painted it with Vintaj Patina Paints in Clay and Agate.


I often like to take inspiration from elements in a photo and incorporate them into the layout.  For this one, I repeated the bows and pleats details of Isabella's dress in the machine embroidery stitching, the wired string with bows twisting through the flower clusters and the pleated satin trim underneath the photo and lower border piece.


Thank you so much for taking a look!


Thursday 18 June 2015

Great-Grandfather John

My Great-Grandfather John


I went with another piece of paper from Prima's Timeless Memories Collection for this one and a piece of  Core'dinations  cardstock for the diecuts.

Prima - Timeless Memories - Forever


I used the We R Memory Keepers Sew Easy tool to pierce parallel lines of a cross pattern and stitched them with embroidery floss.


I die-cut some rectangular shapes from dark-brown coloured metal sheets, then used an embossing folder to make the diamond pattern.  I sanded them lightly and dry-brushed green and white paint over the top before gluing them to the green paper die-cuts.


Spellbinders die - Mega Deckled Rectangles
Sizzix embossing folder - Diamonds and Snow Cap Set

Spellbinders die - Romantic Rectangles 2


On top of the layered rectangles of muslin and burlap I applied thick blotches of white glue, sprinkled them with Stampendous Chiffon Colour Fragments and Aged Ivory and Aged Taupe embossing enamels. I then used a heat gun to melt the enamel and make the glue bubble up giving it a more lumpy texture.  I also applied a couple of patches of this in the top right corner and bottom left edge of the background paper.


Peeking out from under the flower cluster are little bits of spanish moss that I coated with diluted white glue and sprinkled with Shabby Shutters Distress Embossing Powder and heated.  I also did this for my layout called "The Funk Boys" using a brown embossing powder.

Materials
Dripping glue over the moss
Misting the glue and moss with water
Scrunching the moss to spread the glue around
Sprinkling embossing powder over the moss
Melting the embossing powder


Thank you so much for taking a look!

Wednesday 10 June 2015

Roy's Birthday Party

My father (center) when he was little


This is my entry for the June Mood Board Challenge at Scrap Around the World.  I was inspired by the pink and peach colours of the pinwheels in the mood board.


Scrap Around the World June Mood Board


I really like the grungy patterns of Prima's Timeless Memories Collection and used a piece for the background of this layout.

Prima - Timeless Memories - Freedom


Shimmerz texturez paste in Sandy Stone was a perfect match to add subtle stencilled numbers to the background.

The Crafter's Workshop - Numerals (mini template)


The checker chipboard pieces were coated with different colours of embossing powder.


Blue Fern Studios - Checker Bits


This is the die I used  behind the photo.

Cheery Lynn Designs - Spring Flower Burst Doily


The photo I used of my father's birthday party when he was little made me think of an Alice in Wonderland tea party so I thought the toadstool embellishments would go perfectly with that theme. I used molds to make the little teddy bear and car and the toadstools at the bottom left of the photo. The toadstool mold was a rigid mold with zero flexibility.  It was very difficult getting the clay out of the mold without wrecking the shape even experimenting with various release agents.


Baby's Accessories III by Sunflower Sugar Art
Rounded Toadstools by JEM


I painted the clay toadstools and used glitter glue on the top portion to mimic the dimensional toadstool sticker at the top left of the layout.


Along the edges and center of the background, I used a watercolour pencil to add shading ( I used an Albrecht Durer watercolour pencil in middle cadmium red).


Thanks for looking!