Sunday 25 November 2018

Thomas and His Bride

My great-grandfather and his bride on their wedding day


For this layout I used a piece of Ciao Bella paper from their La Traviata collection.


I did some stencilling on the background using Clarity stencil brushes and Distress Inks (Fired Brick and Gathered Twigs).
Clarity Stencil Brushes

Prima
Checker 6"x6"


I also did some hand-stitching on the background and on the photo mat.


These are the dies I used:


Cheery Lynn Designs
Daphne Doily
Cheery Lynn Designs
Ambergris Tiny Doily
Spellbinders
Decorative Labels Eight
Cheery Lynn Designs
Carnivale Border
Tattered Lace
Nested Beaded Chains
Essential Rectangles
Cheery Lynn Designs
Flourish #13


As usual, I layered the die-cuts over a darker version and offset them slightly to accentuate the edges.


This is the chipboard piece I used:


Creative Embellishments
Vintage Flourish 3


I coated the flourish with heavy gesso, let it dry and rubbed it with Fired Brick and Gathered Twigs Distress Inks. I then applied some Scattered Straw Stickles and poured some Fuzzy Navel Prills overtop.


A few of the flowers (the yellow and pink daisies) are old ones from my stash (by Prima I think), a couple of them I made myself a number of years ago but never used and the rest are by 49 and Market.


Vintage Shades Botanical Blends - Cerise
Vintage Shades Potpourri - Cerise


Thank you so much for taking a look!


Monday 29 October 2018

Jack and Lilian

My uncle and aunt in the mid-1920's


For this layout I used some paper from the Remnants collection by Blue Fern Studios.


Blue Fern Studios
Remnants - Devonshire
Blue Fern Studios
Remnants - Highgate
Blue Fern Studios
Remnants - Vignette


I trimmed the Devonshire paper down slightly, ripped off two of the corners, then distressed and inked the edges.  I layered this over the  Highgate paper, tucking in some corrugated paper under the torn edges.  I also put a piece below the photo.  The raised ridges of the corrugated paper were brushed with white paint.


On the background I did some stencilling with modelling paste (Faber-Castell whipped spackle) and added some green watercolour.  I also used a pencil crayon to add a little more pink to the paper along the shaded areas of the flowers.


Memory Box
Texture Splatter


These are the dies I used:

Tattered Lace
Velvet Lace Mini Ruffle Rectangles
Tattered Lace
Sparkle Border


I cut the edges off the Sparkle Border and glued them along the edges of the layout.


This is the chipboard set I used:

Blue Fern Studios
Mesh Bits

I painted the chipboard brown and then applied Ranger Texture Paste Opaque Crackle.  When that was dry I randomly dabbed it with Scattered Straw Distress Ink.


The toadstools and a few of the flower centers were made with molds and Sculpey Ultralight clay and then painted.

First Impressions Molds
Assorted Flower Centers

Pointed Toadstools by JEM


I tucked some natural-coloured reindeer moss into the flower clusters and wound some wired thread with raffia bows by May Arts through them as well.  The leaves and seed stems are by 49 and Market.


Thank you so much for taking a look!

Sunday 14 October 2018

Cece and Maureen

My mother, Cecilia and her younger sister, Maureen


For this layout I used a piece of Blue Fern Studios paper for the background.

Blue Fern Studios
Remnants - Westfield (I used the back side)


I applied some green watercolour to the background, punched the edges and added some eyelets.

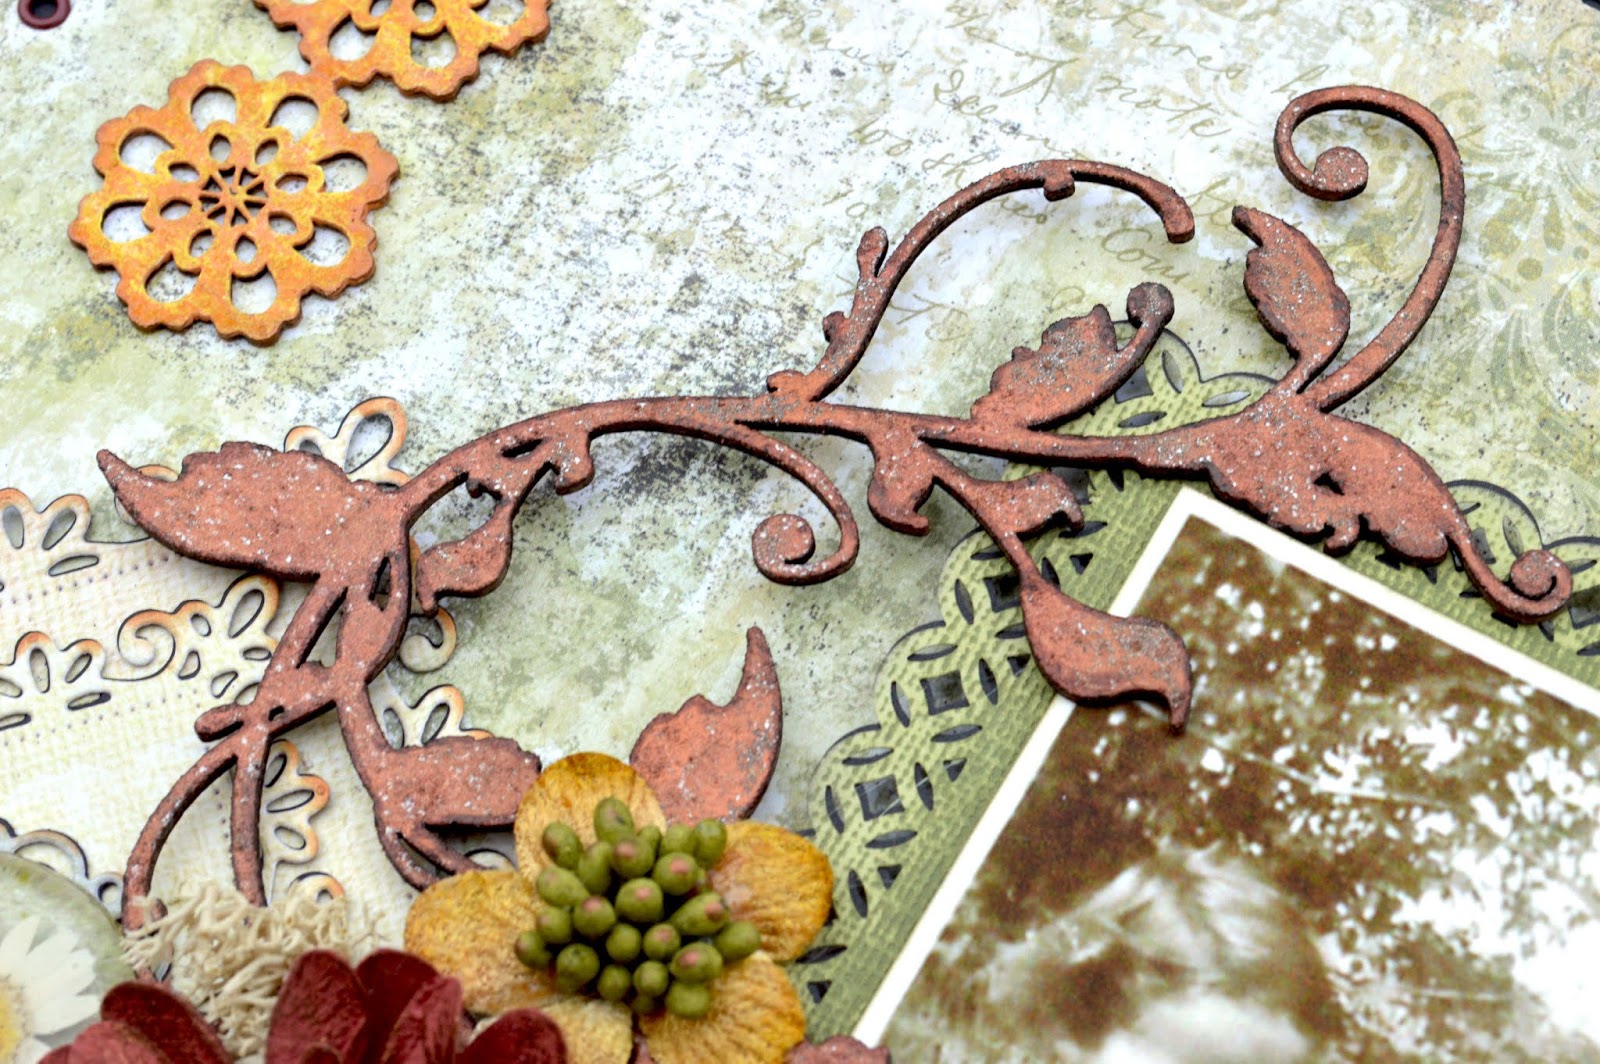
As usual, I layered the die-cuts over a black copy and offset them slightly to accentuate the edges.

These are the dies and punches I used:


Fiskars
In Stitches
Martha Stewart
PATP Modern Garland
Cheery Lynn Designs
Square Frames Set
Cheery Lynn Designs
Horizon Circles


These are the chipboard pieces I used:


Creative Embellishments
Floral Lace Border

Creative Embellishments
Flourish Set 26


Creative Embellishments
Seagrass


I painted the Floral Lace Border orange, inked around the edges in brown and lightly rubbed some yellow paint over the top to make the colour match the flowers more closely and to add dimension.


I tried a couple of different embossing powders on the Flourish Set but the colour wasn't right for the layout so I rubbed them with Prima Metallique Wax in Rich Copper.  I also rubbed some of the wax on the flowers and buttons.


The Seagrass piece was painted green.  I then applied a brown wash over the bottom section and yellow at the tips of the blades to add dimension.


I added bits of natural-coloured reindeer moss and some Prills to the flower clusters.


I made the circular resin piece with some pressed flowers.


Thank you so much for taking a look!