 |
| My son, Colin, on October 18, 2011 |
Though he is very shy and hesitant in most situations, my son, Colin, likes to "ham it up" when I take pictures. The photo I used for this page was one of a series I took of him when he was 8 years old. Originally I had planned to make a multi-photo layout and call it "Colourful Colin" but I could never figure out what to do. This particular photo seemed to fit with the colour of this background paper so I finally decided to abandon my multi-photo page and just use one. I may never get around to creating "Colourful Colin" layouts #2 through #5 but the photos are already printed so I'll leave that option open.
Recently I noticed this product called Brusho Crystal Colour in various online craft and scrapbooking stores. After investigating, I decided it looked kind of interesting (despite the boring white jars it came in) so I bought some to experiment with. Brusho Crystal Colour is basically what the name implies, colour crystals. I poked a hole in the top of the jars (like I saw in some videos online) and sprinkled the crystals on white paper, then misted with water. I tried various papers but didn't really like the way it looked until I tried it on Ranger Specialty Stamping paper. The crystals really blend and swirl beautifully together on this coated paper. On regular scrapbooking papers, watercolour paper and even papers I pre-coated with matte medium or clear gesso, the colours sink in and spread too much and look rather boring and muddy.
This is what the background page looked like after sprinkling with the Brusho Crystal Colour and misting with water. I also went back and sprinkled more colour into the wet areas.

| 
|
I added some stencilling with modelling paste in the corners and near the edges later. The wet modelling paste reactivated some of the crystals and that is why the there are more reddish splatters in those areas. I also did some random punching (with MS punch, Gothic Lace) around the edges and added some little adhesive tiles along those areas.
The chipboard lattice was painted brown, then coated with Distress Crackle Paint in Tattered Rose. I then inked the edges in brown.
 |
| Blue Fern Studios - Garden Lattice Bits |
The chipboard leaves were coated with clear ink and heat embossed with UTEE (ultra thick embossing enamel). I then inked them with some red and brown chalk inks and dabbed them lightly with a peach coloured paint.
 |
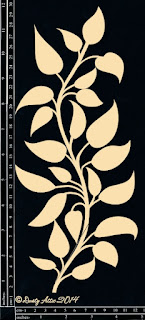
| Dusty Attic - Leafy Stem #3 |
The corrugated cardboard was painted white and coloured lightly with some of the Dark Brown Brusho Crystal Colour mixed with water and applied with a brush. I also inked the edges in brown and layered the cardboard over some dark brown burlap which I also used to mat the photo.
Here are some more close-ups:
Thank you so much for taking a look!


I'm speechless! Absolutely speechless! LOL! This is fantastic! So artistic! Tracy, you have everything it takes and more. This leaves me totally breathless!
ReplyDeleteBeautiful! Thank you for explaining how you made the background. I might have to try the Brusho crystals.
ReplyDeleteyou are a Queen of Details Tracy!:) every LO is stunning!
ReplyDelete